Recently, to do a little bit of 3D modeling, I wanted to try my hand at making a modular back cover for my iPhone. Yes, there’s too many 3D printable models of iPhone covers, but sometimes, we reinvent wheels not to have more wheels, but to have more inventors. To do something a bit more organic, my concept was to have a pattern of leaf veins for my iPhone backcover, Graftleaf.
However, instead of drawing a leaf pattern myself, I generated the pattern from an image using free tools. That’s what the rest of this tutorial will help you do, and what I learned.
First, I had to go find a creative commons image of some leaf veins. I need something that was CC-BY, which allowed derivative works. I also needed the image to be sharp (damn you, tilt-shift) with high contrast. I used flickr’s advanced search, so you can look for CC images.
There were a good number of results, but I picked this one by Steve Jurvetson, which fulfilled my criteria above.
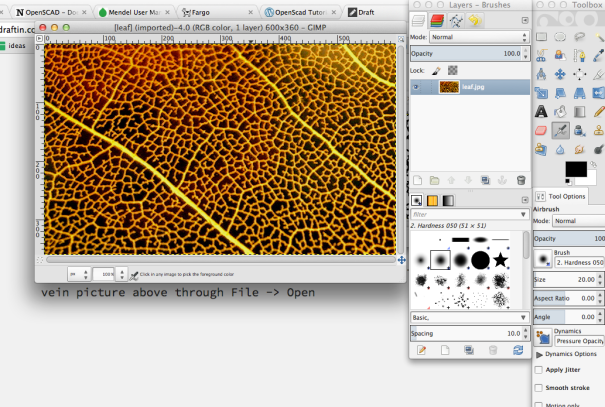
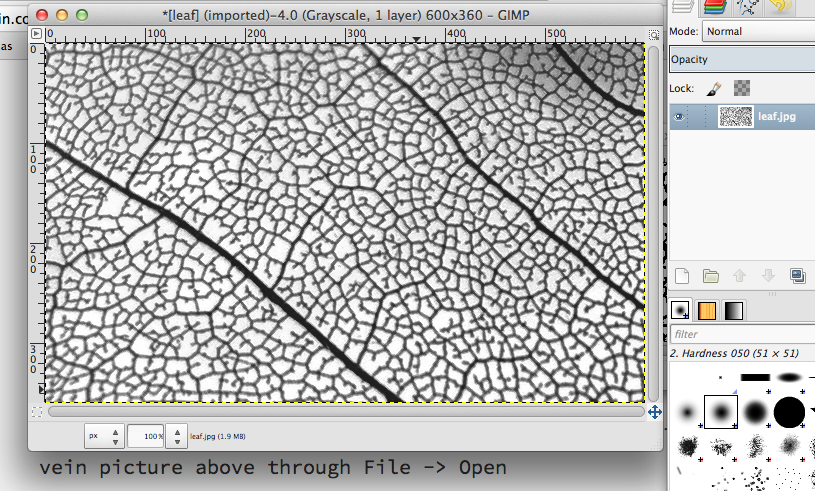
Next, I fired up GIMP, an open source alternative to Photoshop. After you open up GIMP, then open up the leaf vein picture above through File -> Open.
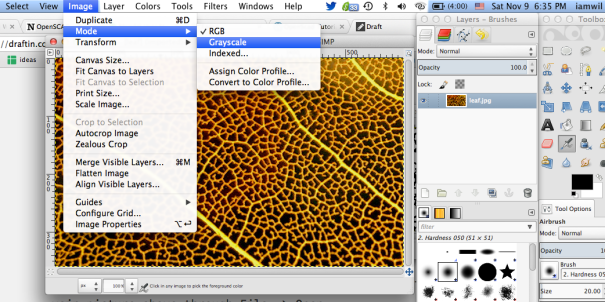
Now we want to convert it to grayscale. Image -> Mode -> Grayscale.
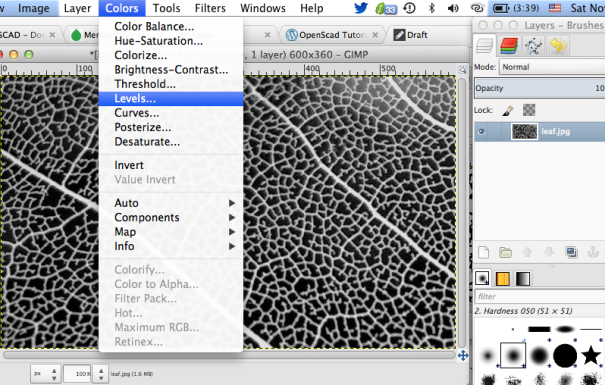
However, the colors are inverted. We want the veins to be black. Colors -> Level.
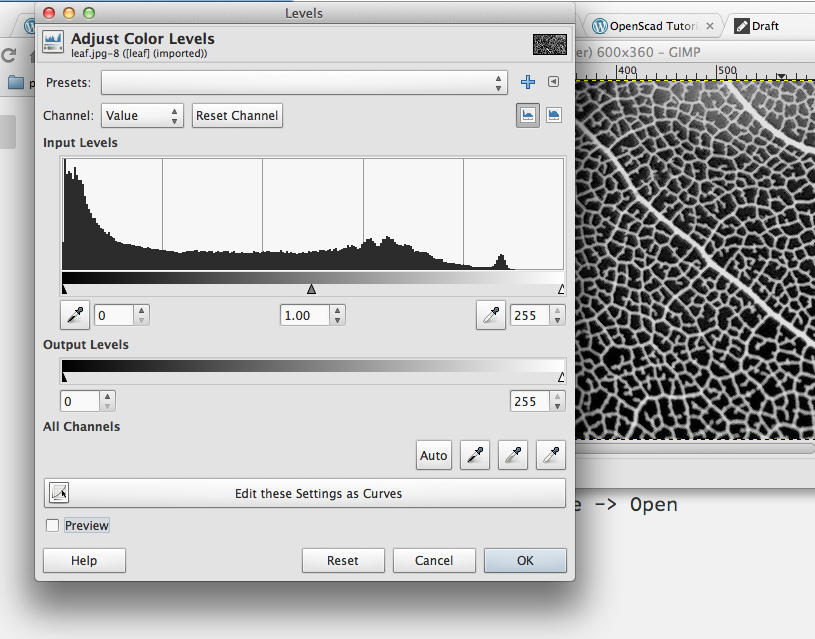
Move switch the positions of the black and white arrows in “Output Levels”
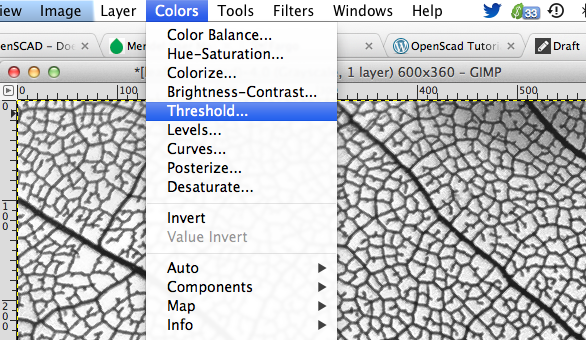
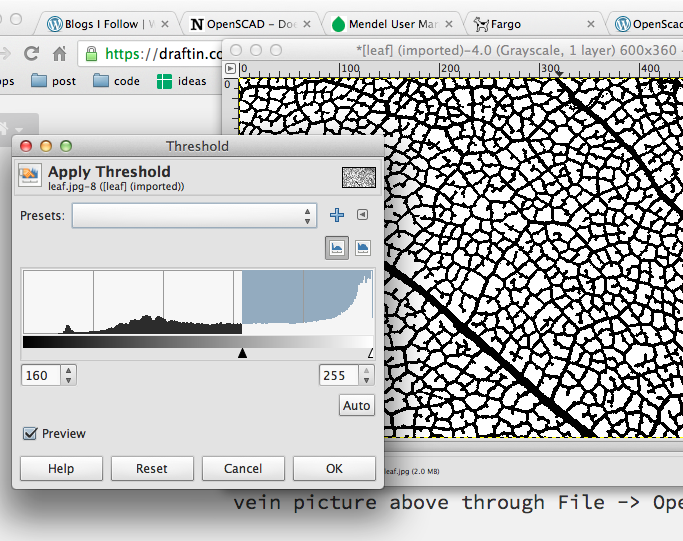
Now, we want to make the veins a solid black and white. Choose Colors -> Threshold. Adjust it until it the veins are thick, but there aren’t too many spots in the cells between the veins.
Lastly, we want to crop the image to make the details more visible, as well as reducing the complexity of the image, so the PNG to DXF conversion won’t take a long time.


Now that our image is edge detected, and we can now save it to a file as a PNG. Now, we’ll use an open source tool for vector drawings, called Inkscape, to convert the PNG to DXF.
This is where OpenSCAD gets a little finicky. It can’t read all types of DXF files, so we need to install an Inkscape extension that allows us to save DXF files in a format OpenSCAD can read. Go download the extension. To install it in Inkscape, copy the *.py and *.inx files (in the zip file of the extension) to your Inkscape extensions folder. Where the extensions folder is located depends on what system you’re using.
- Linux: ~/.config/inkscape/extensions/
- Mac OS X: /Applications/Inkscape.app/Contents/Resources/extensions/
- Windows: C:\Program Files\Inkscape\share\extensions\
(If you’re all-pro, you can use git to clone the extension into the inkscape extension folder.)
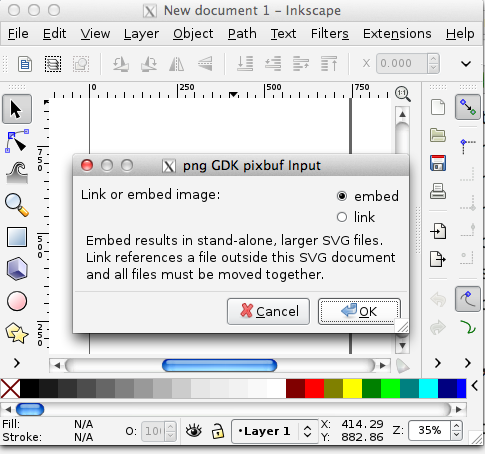
Once you have that installed, open up Inkscape and load up the leaf PNG we just saved. When it asks you if you want to link or embed, choose embed.
Next, we want to trace the bitmap we have as a path. First select the bitmap by clicking on it. Then Path -> Trace Bitmap. I just used the default options, but you can play around with things then click update to see what it would look like.


Now you have two objects on the canvas. One is a vector path of the leaf veins, overlaid on top of the bitmap of the leaf veins. Move the vector path out of the way by dragging and dropping it. Then select the bitmap and delete it. Then move the vector path back.
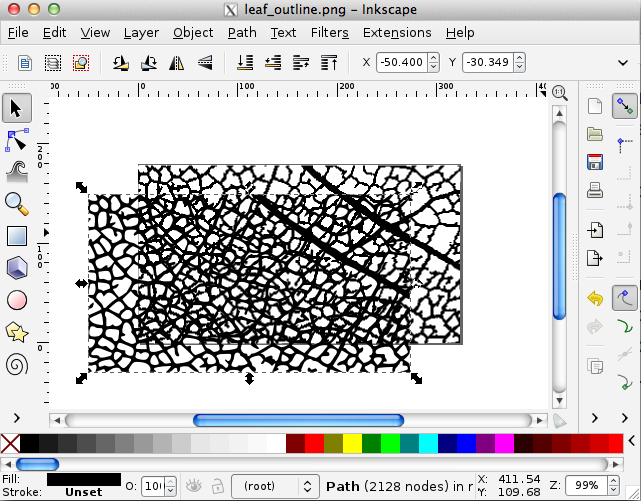
Now, we can save it to DWF using the extension we installed earlier. File -> Save As. Make sure you select “OpenSCAD DXF Output (*.DXF)” as the file type to save as.

We finally have our DXF file that we can use in OpenSCAD, as you can see all the assets.
Now, we can use it in our OpenSCAD! We can write the OpenSCAD snippet:
linear_extrude(height = 4)
import(“leaf_outline.dxf”);
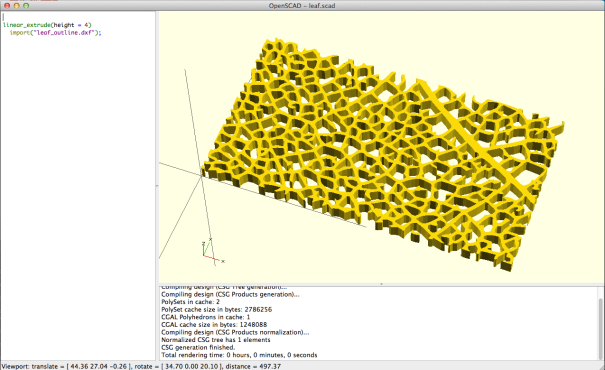
In making Graftleaf, I actually did the additional step of compiling with CGAL (F6 in OpenSCAD), and then exporting the result to STL. Then using the STL in the final model, for faster renders.


If you found this more advanced OpenSCAD tutorial helpful, let me know! I’ll write more. Have a great week!

I enjoyed reading this tutorial, so count this as a vote for more posts like this! Thanks Wil.
Thanks! No problem. I wrote a beginner’s tutorial on OpenSCAD, recently. More advanced ones to come! http://blog.cubehero.com/2013/11/19/know-only-10-things-to-be-dangerous-in-openscad/
Thanks your very much for this well written and easy to following tutorial, Hope to see more,
I am having trouble with the installation. I can’t find the extensions folder for inkscape. And what commands do you use to install it in the extensions folder? Thank you!
I’ve updated the post to show different locations on different systems.
These files are located in different directories on different platforms:
Linux: ~/.config/inkscape/extensions/
Mac OS X: /Applications/Inkscape.app/Contents/Resources/extensions/
Windows: C:\Program Files\Inkscape\share\extensions\
There’s no command. All you have to do is copy the *.py and *.inx file into the inkscape extension folder. And then restart Inkscape.
[…] And that’s it! That’s really all you need to know to get started and get dangerous in OpenSCAD. If you would like to see how other chess pieces were written, check out king’s gambit, my first 3D printed project using OpenSCAD. If you’d like to learn more, check out a previous more advance tutorial on how to generate patterns from images with OpenSCAD. […]
[…] I showed you how to extrude images in OpenSCAD, and a beginner’s guide to OpenSCAD. This time it’s a more advanced method on how to […]
I too find these kinds of OpenSCAD posts enjoyable and informative. Thanks Wil.
Awesome and easy to follow.

Here is what I was able to design with it:
Awesome! I assume the soundwave is of you saying the text below. That’s pretty neat. Upload it on https://cubehero.com
It wasn’t me, it was for a commission(for free, I’m just learning). It is someone’s daughter saying it. It is more of a personal project, not really for upload. I will certainly be contributing in the future though.
Great tutorial!! Thanks!!!!
i want to know the last librery you use “../lib/graftconcepts.scad” where can i find it???
You can find it here:
https://cubehero.com/physibles/iamwil/graftleaf/trees/53c829a9afc218774d339ec86e6f56f7c4b63bb3
I get an error when trying to export the file using the dwf extension. The dwf file will then load, but when imported into openscad, I get an error saying ‘no top level geomtry to render’. I definetly put the extension files in the right folder. What do you think is wrong?
Well the question is simple: the path must be complete in order to openscad find the file. Even so, openscad can’t open it.
Best, thank you for your tutorial.
Oscad now supports png’s, i just tried a bw 1024 one it works just by drag png into oscad. color png didnt work.
[…] InkScape? Inkscape seems to be a very powerful way of turning images, logos, and patterns into scalable vector graphic images that you can import into Blender or other modeling software. I’ve seen many people having success with it on the Internet. […]
Exactly what I needed to print the custom didgeridoo mouthpiece of my dreams. Thanks for sharing. BTW: (maybe in the Windows world only) the bitmap is on top after tracing.
Perfect!
Thanks for your precious help!
Great and on the spot. No lines wasted.
Thank you!
That was easier than i thought it would be! Gonna give it a shot later today. Thanx for the tutorial man!
[…] out everything (if it would work at all) and after it really printed I could even experiment with the toolchain iamwil described here, to turn the band logos of Tongue and Unru into 3D objects for some of my […]
[…] https://cubehero.com/2013/11/11/how-to-generate-extruded-3d-model-from-images-in-openscad/ […]
Thanks for the post, it is REALLY great!!, I’ve used to do a supple of things. Now, I’m trying to map a sphere with the pattern created, is that possible? The link for the graft concept.scad is not working, could you please update it? Thanks!!
Nice tutorial. Worked perfectly for med. I made a chair for my grand doughter’s dolls house 😉 .
I’m doing something wrong. I get to the Inkscape save as… step and I get a number of errors in the extension-errors.log. It looks as if I don’t have the right kernel or something. I’m on Fedora latest 32bit.
partial output of extension-errors.log:
Extension “DXF Output” failed to load because a dependency was not met.
Dependency:
type: executable
location: path
string: pstoedit
description: pstoedit must be installed to run; see http://www.pstoedit.net/pstoedit
Extension “XFIG Input” failed to load because a dependency was not met.
Dependency:
type: executable
location: path
string: fig2dev
Extension “Sketch Input” failed to load because a dependency was not met.
Dependency:
type: executable
location: extensions
string: sk2svg.sh
Extension “Sketch Input” failed to load because a dependency was not met.
Dependency:
type: executable
location: path
string: skconvert
Extension “Sketch Input” failed to load because a dependency was not met.
Dependency:
type: file
location: extensions
string: sk2svg.sh
Also, when I choose save as to create the .dxf file openSCAD does not appear.
I get Desktop Cutting Plotter (DXF R14) as the only dxf option.
Thanks in advance.